
Auto Studio turns phone photos of your stock into consistent, showroom-style images. The basic workflow is always the same: take or upload the photos, choose a background, pick your options in Processing Settings, then process. This guide covers each step and every option in turn. If you just want a quick overview, see the short how-to on the features page.
1. Take photos with the guided camera
You can upload photos you've already taken, but you'll get the most consistent results by shooting with the Auto Studio camera on your phone.
- Open the Auto Studio app on your iPhone or Android phone and start the camera.
- Choose the angle you want. A ghost overlay of a car appears on the screen for that angle.
- Walk round until the car lines up with the overlay.
- Keep the points where both tyres touch the ground below the red line. If the tyres are on or above the line, you're too far away.
- Take the shot, then move to the next angle.
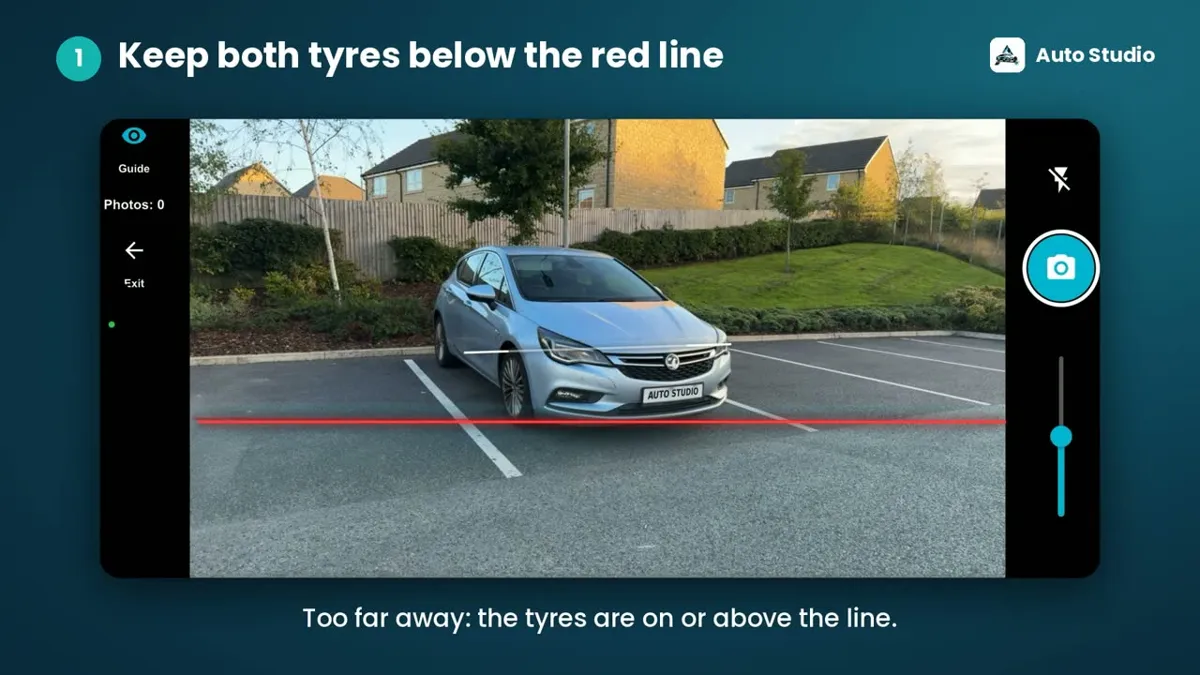
Why the red line matters, with good and bad examples: why both tyres need to be in frame. For which angles to take, use the car photo angle checklist.
2. Upload photos, one or many
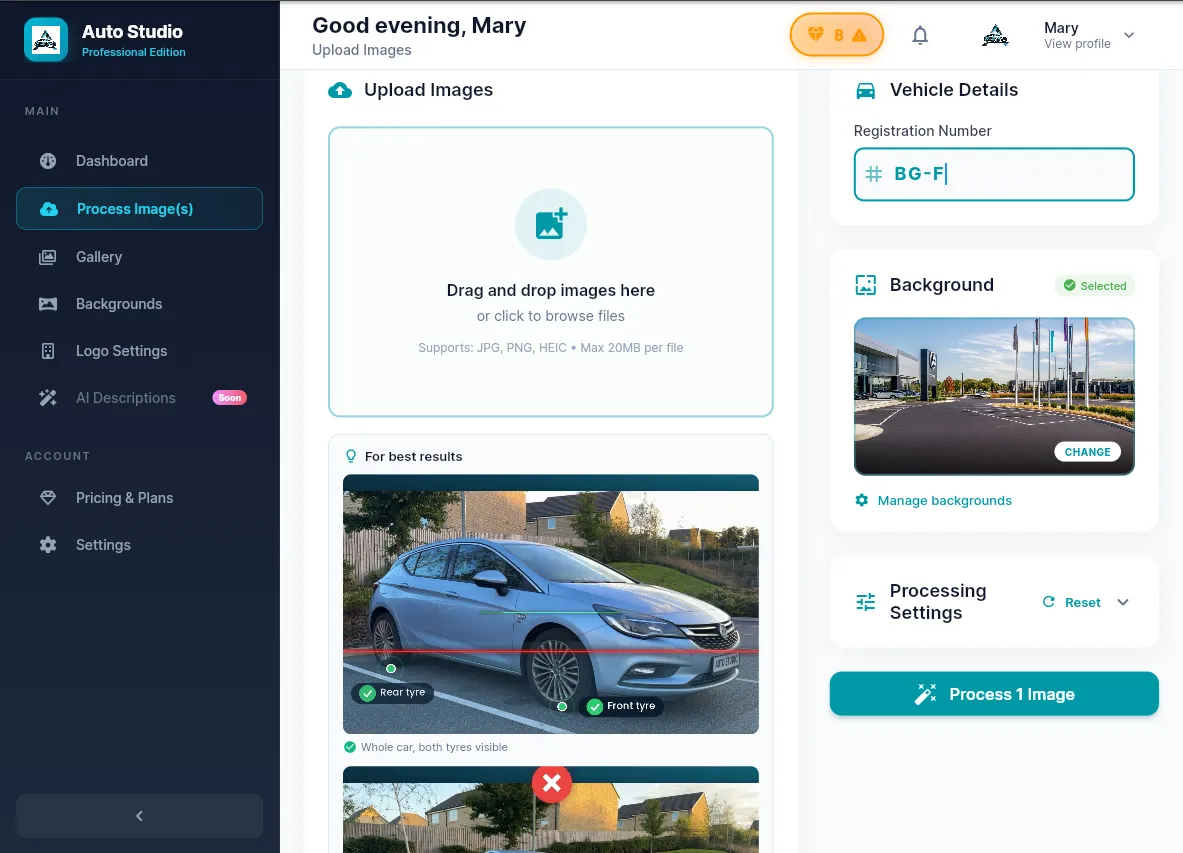
- Open Process Image(s) from the menu.
- Drag and drop photos into Upload Images, or click to browse. JPG, PNG and HEIC files are supported, up to 20MB each.
- To bulk upload, simply add several photos at once. They're all processed with the same background and settings.
- Under Vehicle Details, type the Registration Number so the photos are grouped under that vehicle.
The upload screen also shows a "For best results" panel with examples of a good and a bad photo.
3. Choose a background
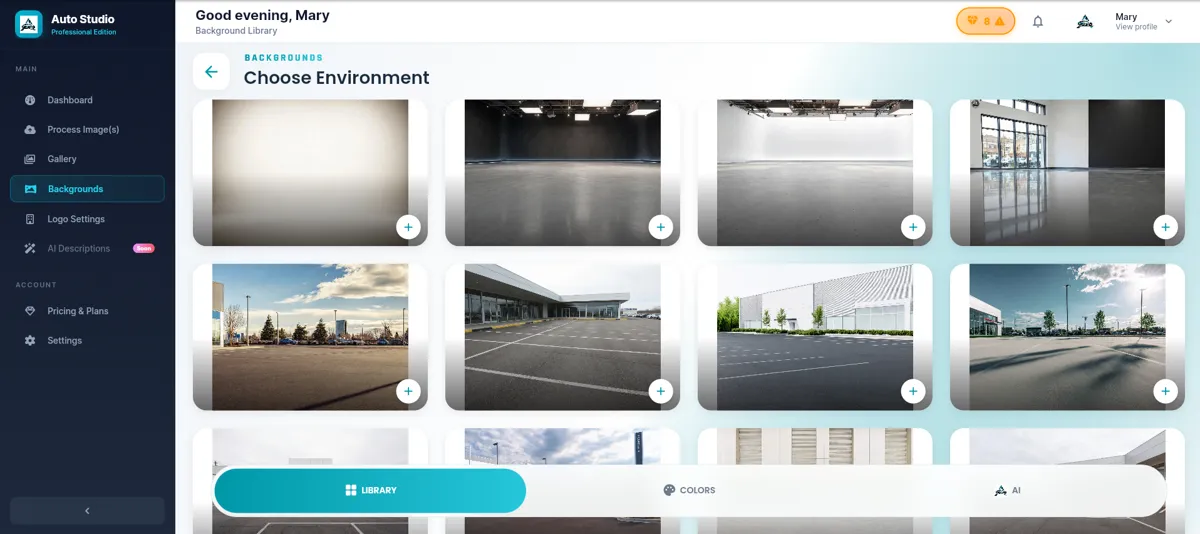
- On the upload screen, press Change on the Background card. You can also open Backgrounds from the menu.
- Browse the Library of 60+ standard backgrounds: studios, showrooms and outdoor scenes. There are also Colors and AI tabs.
- Select a background. It becomes your default, so it's ready for the next car.
How many backgrounds in the library you can use depends on your plan. On Starter and above you can also use custom backgrounds (limited-time offer), for example one that matches your own showroom. Using the same background for all your stock is what makes your listings look like they come from one dealership.
4. Processing Settings, switch by switch
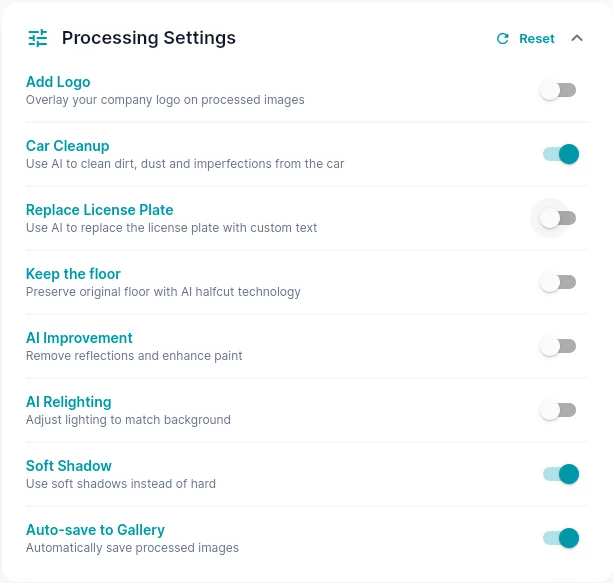
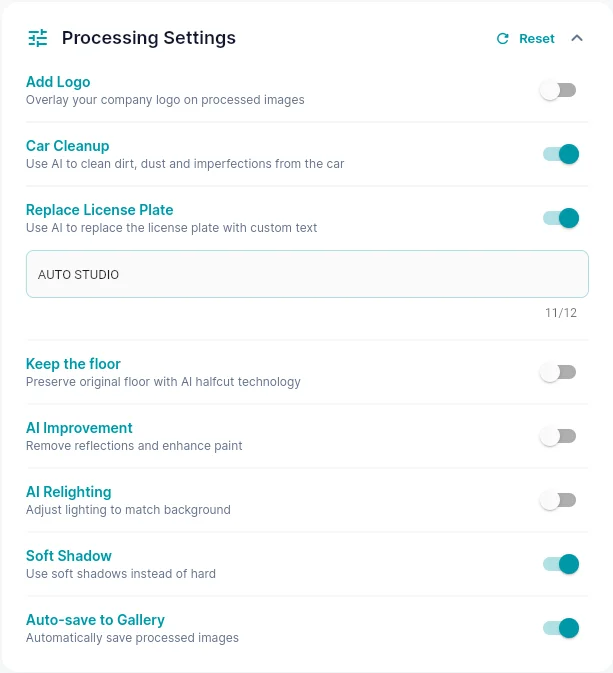
On the upload screen the Processing Settings panel starts collapsed. Tap the Processing Settings heading (or the arrow on the right) to expand it. Each option is a switch. Your choices are saved to your account for next time, so what you see may differ from the defaults; Reset puts every switch back. For a new account only Soft Shadow and Auto-save to Gallery are on.
Add Logo
Puts your dealership logo on every processed image. Off by default.
- Open Logo Settings from the menu and press Upload Logo.
- Choose a Logo Position (top left, top centre or top right) and a Logo Size, then press Save Settings.
- Back in Processing Settings, switch on Add Logo. Until you've uploaded a logo, the switch is greyed out with a reminder to upload one.
Car Cleanup
Off by default. Switch it on and the AI:
- cleans off dirt, dust, mud and road grime;
- tidies minor dents, scratches and paint chips;
- polishes the paint, cleans the alloys and dresses the tyres.
Car Cleanup only works on the outside of the car. It doesn't change interiors, so clear out personal items and tidy the cabin before you photograph it. It's for minor marks: it isn't a substitute for disclosing real damage on a listing.
Replace License Plate
Replaces the number plate with text you choose. Off by default.
- Switch on Replace License Plate. A text box appears underneath.
- Type the text, for example your dealership name. It can be up to 12 characters.
The switch does nothing on its own: if the text box is empty, plates are left exactly as photographed, and the app shows a reminder.
Keep the floor
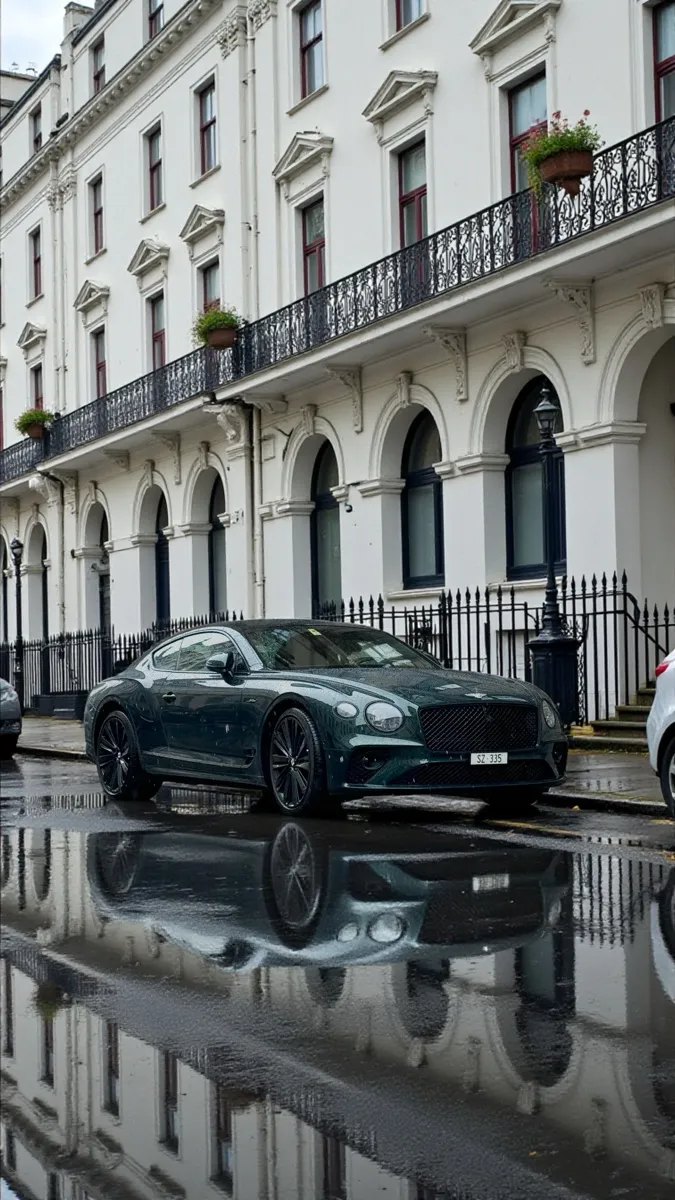
Off by default. Normally the whole background, including the ground, is replaced. With Keep the floor on, the AI keeps the original ground from your photo (an "AI halfcut") and only replaces what's above it, so the car keeps its real shadow and contact with the ground.
Use it when the floor in your photo is clean and looks good, such as a tidy forecourt or a showroom floor. Leave it off if the ground is cluttered, wet or patchy, because whatever is on the floor stays in the photo.
Soft Shadow
On by default. When the car is placed on a new floor, Auto Studio adds a shadow underneath so it doesn't look like it's floating. Soft Shadow makes that shadow soft; switch it off for a harder shadow. The switch is hidden while Keep the floor is on, because the car's real shadow is kept.
AI Improvement
Off by default. Removes reflections from the bodywork and enhances the paint. Useful when the car is picking up the sky, buildings or other cars, which is common on dark or shiny paint.
AI Relighting
Off by default. Adjusts the lighting on the car to match the background you've chosen. It helps when the light at the time of the photo doesn't suit the new scene, for example a car shot on a grey day being placed in a bright showroom.
Auto-save to Gallery
On by default. Every processed image is saved straight to your dealership gallery. Leave it on unless you have a reason not to.
Tip: try a few combinations on the same photo with your free credits, then keep the settings that suit your stock. They're remembered, so you only set them once.
5. Process, check and download
- Press the Process button. It shows how many images will be processed, for example "Process 1 Image".
- Open Gallery to see your finished images.
- Check each one before you publish it, as with any automated edit, then download it for your listings.

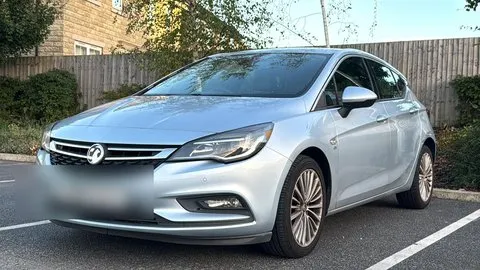
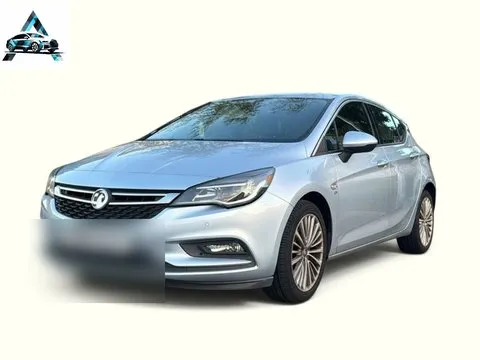
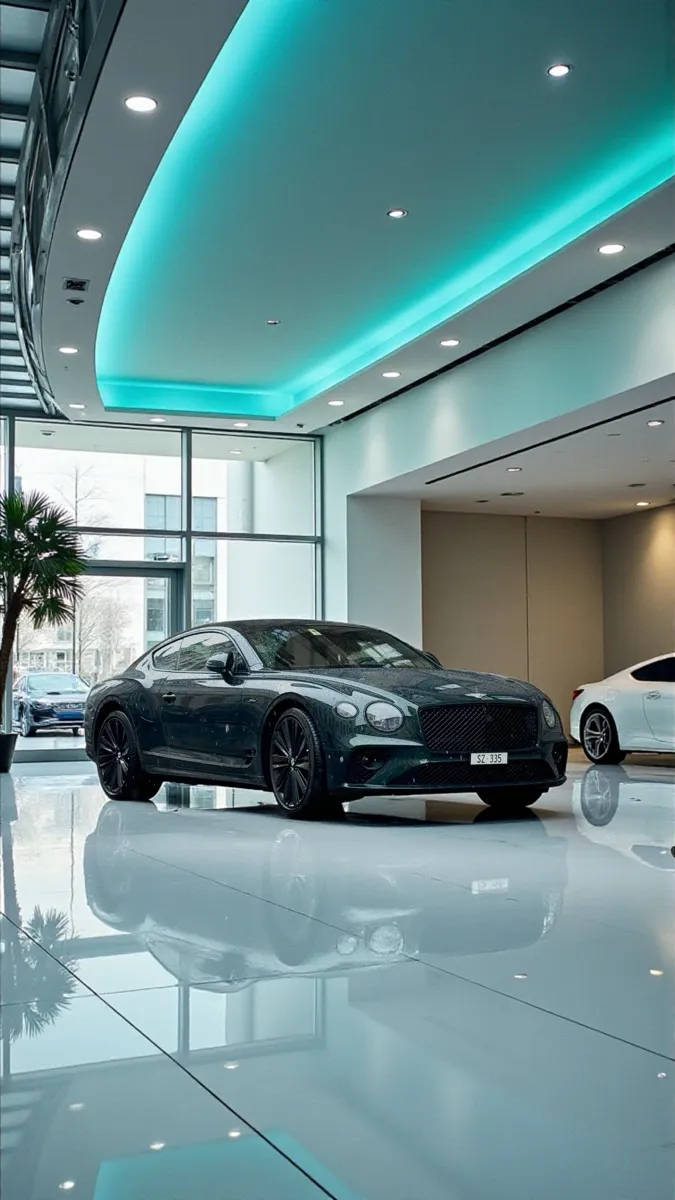
And here is a full before and after, from a phone photo on the street to a showroom image:
 Before
 ✨ After Auto Studio
6. Web, iPhone and Android
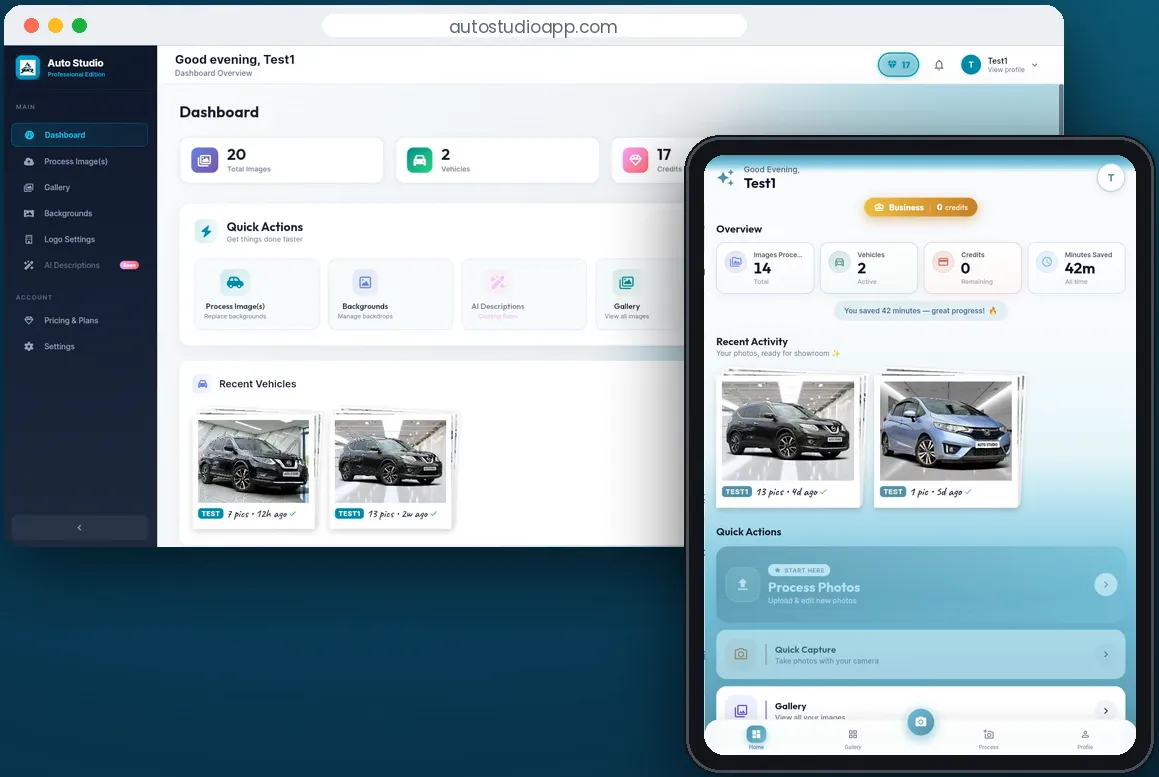
Auto Studio works in a web browser and in the iPhone and Android apps, with the same account. A common setup is to take photos on a phone on the forecourt and manage the gallery from a computer in the office.
The Dashboard shows the number of images processed, vehicles, credits remaining and recent activity, with quick links to process photos, backgrounds and the gallery.
7. The API
On Business plans and above, you can send photos to Auto Studio from your own systems, such as a DMS or your website, instead of uploading them by hand.
- Generate a key under Profile → API Keys.
- Send each image URL and a background to the REST API. Each processed image uses 1 credit.
Full details, with examples, are in the API docs.
8. AI listing descriptions (coming soon)
AI-written vehicle descriptions for your listings are on the way. You'll see AI Descriptions in the menu marked "Soon". We'll update this guide when it's available.
9. How credits work
1 credit = 1 processed photo, whichever switches you turn on. Car Cleanup, AI Relighting and the rest don't cost extra. Accounts registered during the current launch offer get 10 free credits every month, with no credit card required. Plans and prices are on the pricing page.