
Consistent photos start with a consistent shot list. When everyone on your team takes the same angles in the same order, your listings look professional, buyers can compare cars easily, and nobody has to remember what they missed. Use this checklist as a starting point and adjust it for the cars you sell.
Before you start
- The interior is tidy: personal items, paperwork and air fresheners are removed.
- Trade plates and any old stickers or decals are removed.
- The front wheels are straight.
- The car is in even light, without low sun or harsh shadows across it.
- The phone lens is clean.
There is no need to wash the car first. Turn on Car Cleanup and the AI removes dirt, dust, mud, road grime, water spots and bird droppings, tidies minor dents, scratches, scuffs and paint chips, polishes the paint, cleans the alloys and dresses the tyres. It doesn't touch the interior, which is why the cabin still needs a tidy.
Exterior angles
The Auto Studio camera has a ghost overlay for seven guided exterior angles. Line the car up with the outline and keep the points where both tyres touch the ground below the red line.
- Front three-quarter (lead image). Stand off one front corner so you can see the front and one side of the car. This is the most common choice for the main listing photo.
- Opposite front three-quarter. The mirror image of the first shot, from the other front corner.
- Front. Straight on, centred on the badge, at roughly headlight height.
- Side profile. Square to the side of the car, with the whole car from bumper to bumper in shot.
- Rear three-quarter. From one rear corner, showing the back and one side.
- Opposite rear three-quarter. The same shot from the other rear corner.
- Rear. Straight on, centred on the boot.
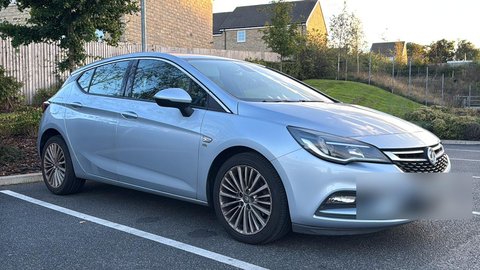 Before
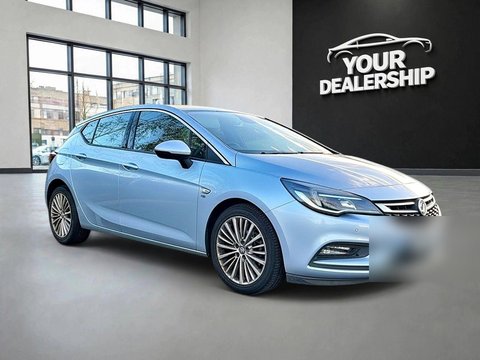 ✨ After Auto Studio
Interior shots
- Dashboard from the rear seats, showing the steering wheel, screen and centre console.
- Driver's seat from the open driver's door.
- Instrument cluster with the ignition on, showing the mileage and no warning lights.
- Infotainment screen, ideally showing navigation or a feature buyers care about.
- Rear seats from an open rear door.
- Boot, open and empty, with the parcel shelf in place.
Detail shots
- A wheel and tyre, showing the alloy design and tread.
- Headlights and tail lights, especially if they are LED or a distinctive design.
- Key features: panoramic roof, upgraded audio, heated seats, towbar.
- The service book and keys, if you want to highlight a full history or a spare key.
- Any marks or damage a buyer should know about.
Tips for the exterior angles
Get the height right
For most exterior shots, hold the phone at about headlight height. Too high and you look down on the car; too low and it looks distorted.
Leave a margin
Keep a little space around the car on every side. Cropping off a bumper or mirror makes a photo look careless and gives the AI less to work with when it replaces the background.
Keep both tyres in frame
This is the rule that makes the biggest difference to how natural the car looks on a new background. Here is a good and a bad example:
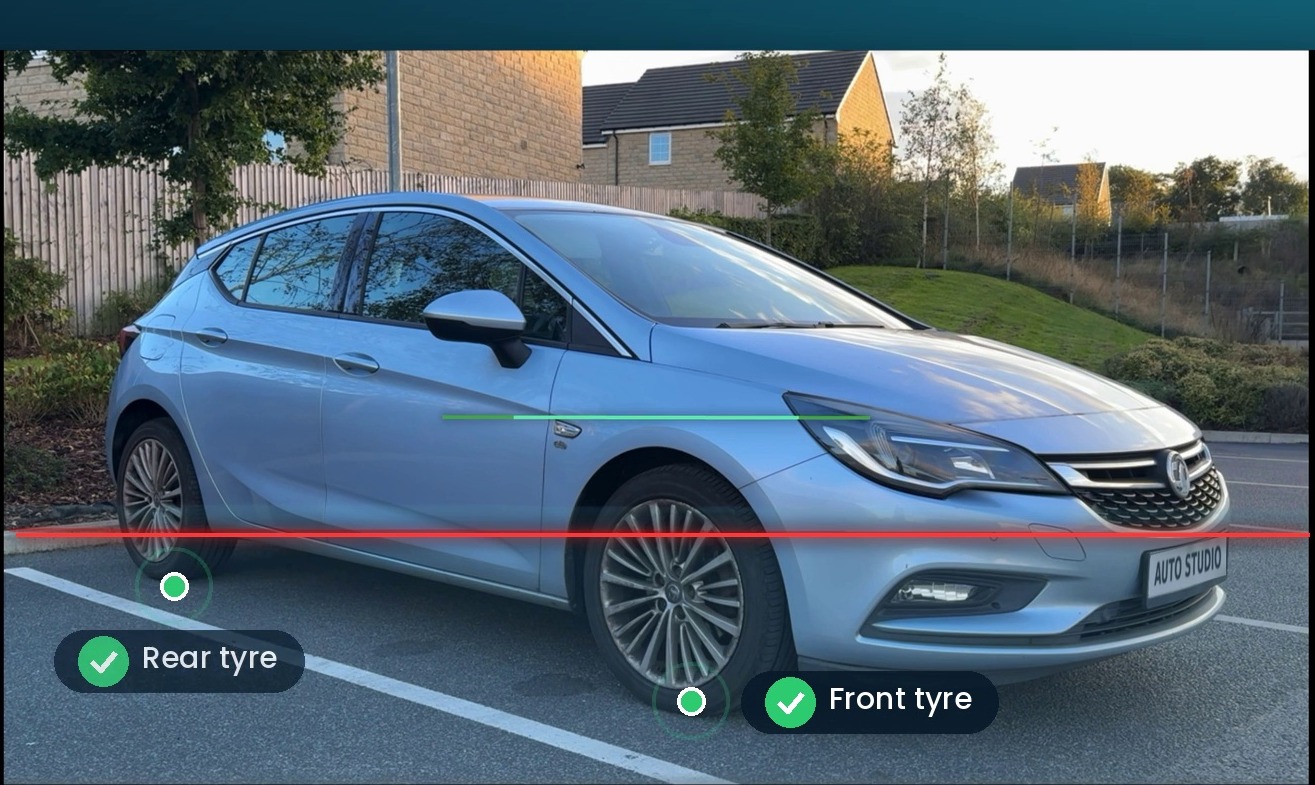
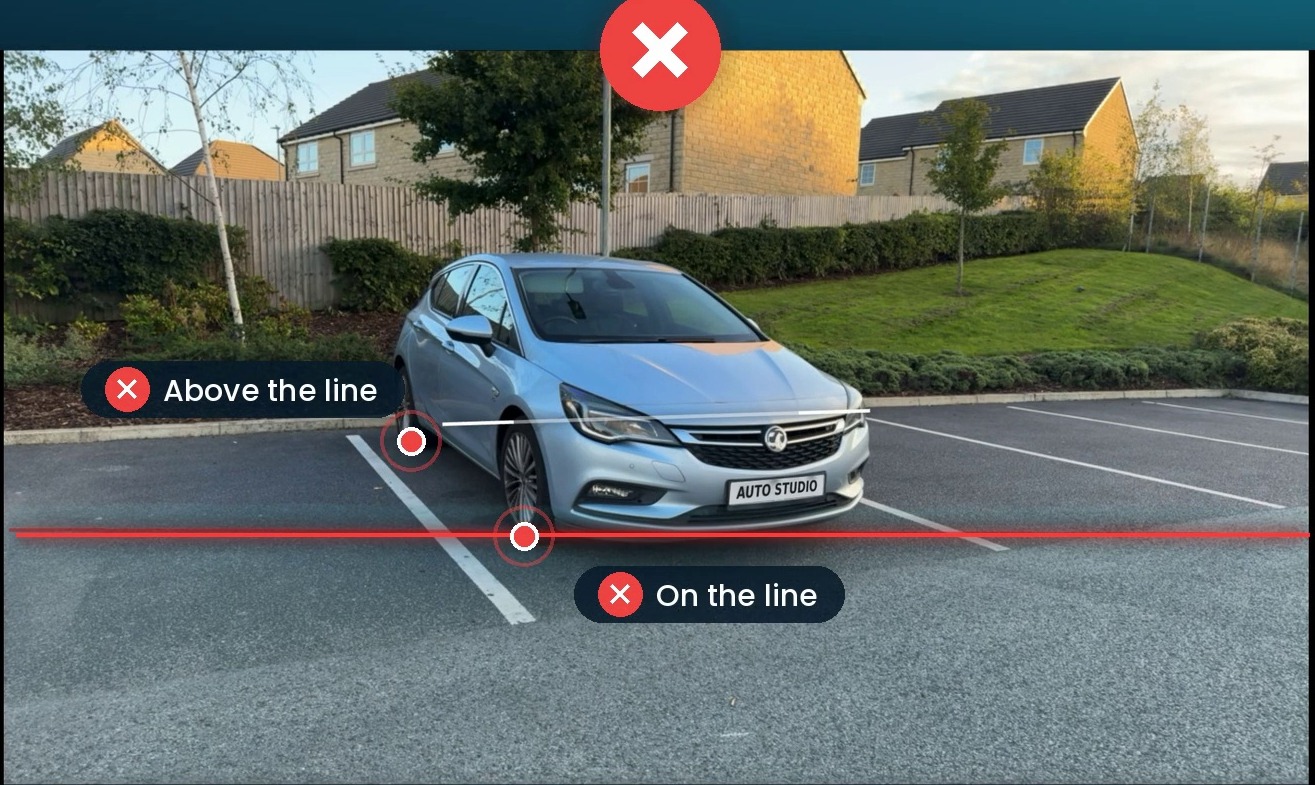
Our guide on why both tyres need to be in frame explains it in more detail.
Make it stick
Print this checklist and keep it where you photograph cars, or share it with your team on their phones. Once the shot list is routine, pair it with a consistent background using background removal, so every car on your AutoTrader listings and website looks like part of the same stock.